


DIY Guide to Minor Car Scratch Repair
- coledem
- Aug 5, 2025
- 11 min read
Dealing with a minor car scratch yourself can be surprisingly straightforward. Often, it is just a matter of assessing the scratch, cleaning the spot, applying a bit of cutting compound or touch-up paint, and then finishing it off with a good polish and wax. For those light scuffs that have not broken the paint, you can often buff them out with a quality polishing compound in less than an hour.
How to Assess Car Scratches and Choose a Repair Method
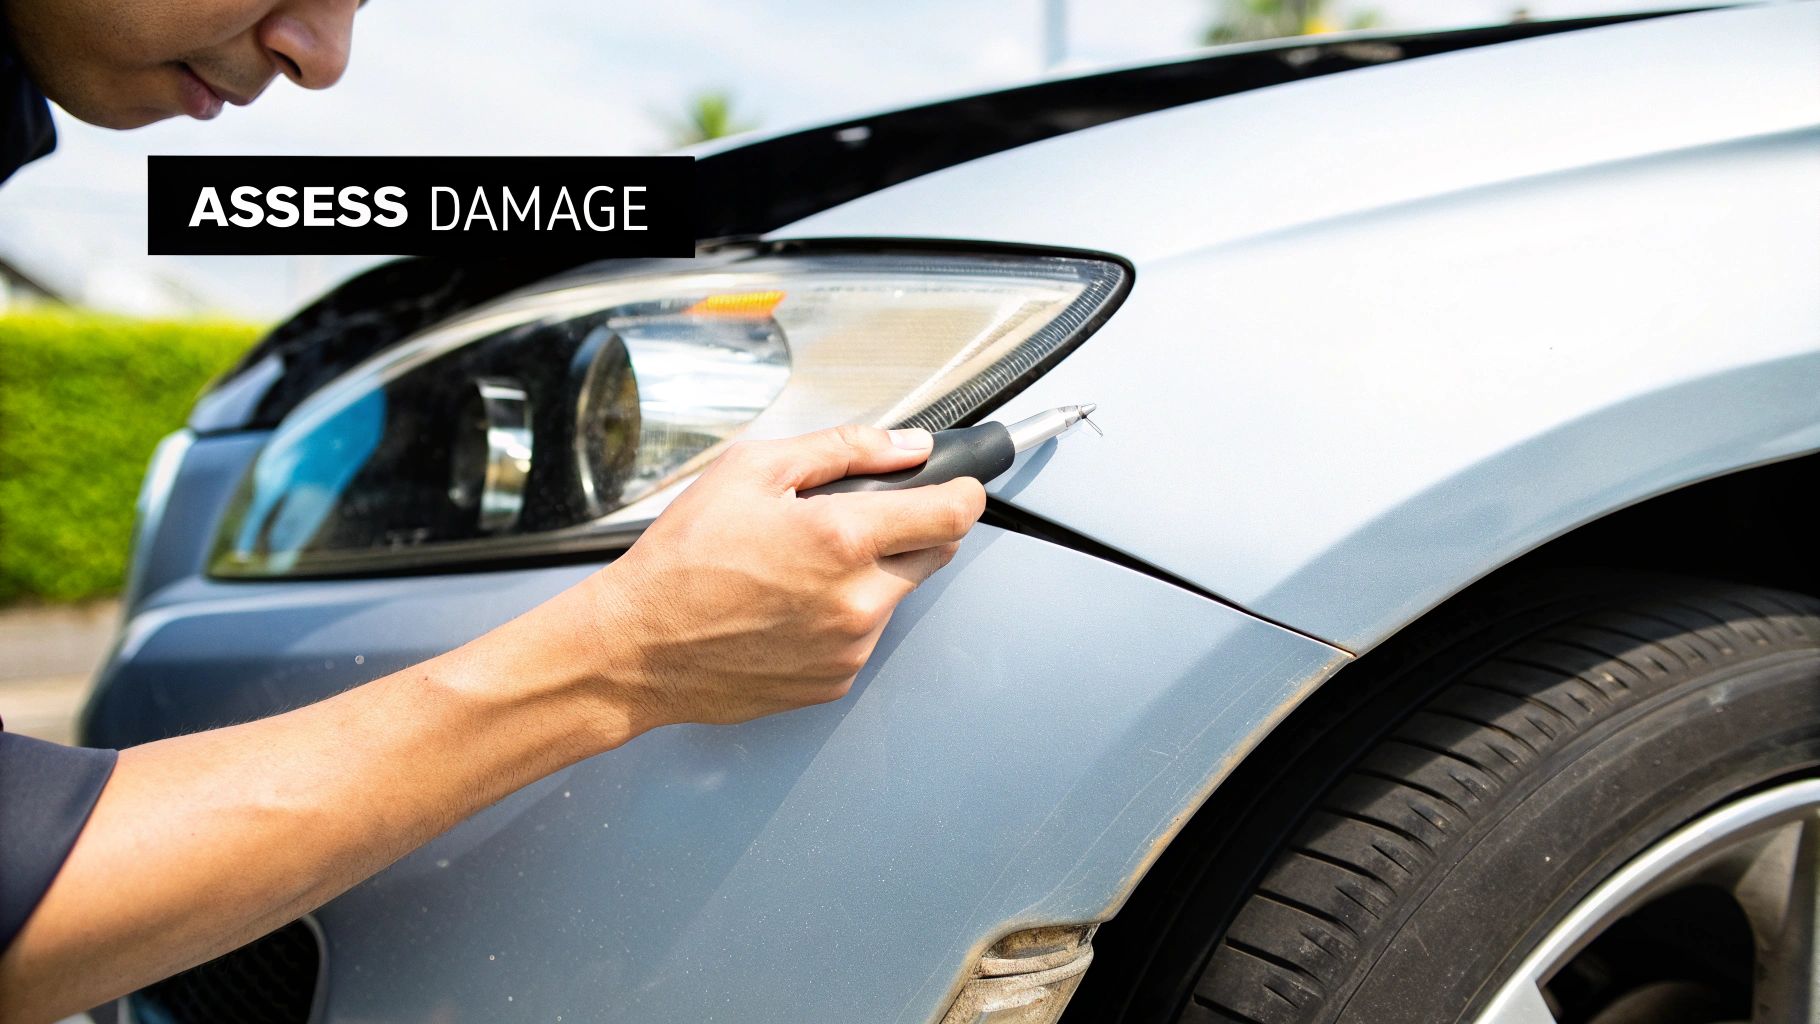
Before you grab any tools, you need to get a proper handle on the damage. All scratches are not created equal, and jumping in with the wrong approach can easily make a small problem much bigger. Your first job is to figure out just how deep that mark goes.
A classic trick of the trade is the fingernail test. Just run your fingernail gently over the scratch. Does it glide smoothly across? If so, you are likely dealing with a simple surface scuff in the clear coat. If your nail catches in the groove, that scratch is deeper, probably down to the colour coat or the primer underneath.
A scratch that feels smooth can often be polished out. If your nail snags in it, you are almost certainly going to need touch-up paint—or maybe a professional's touch—to fix it properly.
Deciding Between DIY and a Professional
Your initial assessment dictates your next move. For those faint surface scuffs, a good polishing compound is usually all you need. Deeper marks that have broken through the top layer will call for a touch-up paint kit matched to your car’s specific colour code.
Now, let's talk about the cost, which is a big factor for most people. In the UK, the difference between doing it yourself and calling a pro is pretty stark.
DIY vs Professional Repair Cost Comparison
Here is a quick look at what you can expect to pay for different minor scratch repair options here in the UK. This should help you weigh up the costs and decide what is best for your situation.
Repair Type | Typical UK Cost | Best For |
|---|---|---|
DIY Polish/Compound Kit | £10 - £20 | Very light surface scuffs in the clear coat. |
DIY Touch-Up Paint Kit | £20 - £40 | Scratches that have reached the colour or primer layer. |
Professional SMART Repair | £80 - £150+ | Deeper scratches, small dents, or when a perfect finish is a priority. |
As you can see, a bit of DIY can save you a fair bit of money if the damage is minor. It is a satisfying fix when you get it right.
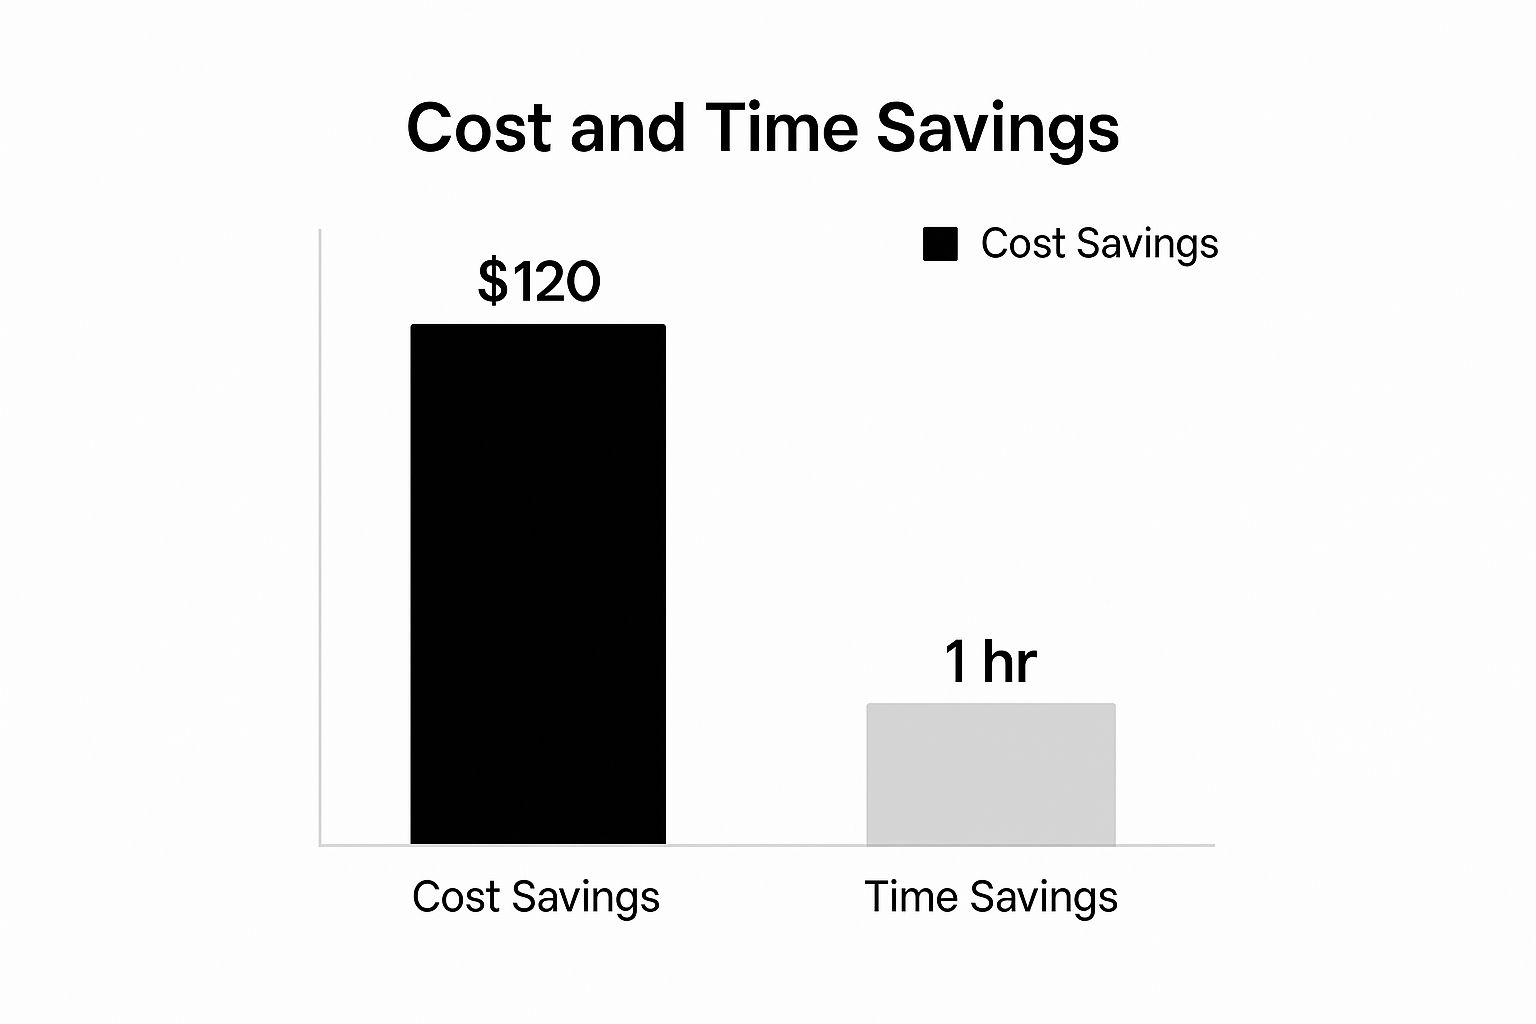
This drives home the point that for the right kind of scratch, tackling it yourself is a smart way to save both time and money.
Be realistic. If the scratch is down to the bare metal, spreads over a large area, or you are simply not confident you can do a good job, calling in a professional is the wise choice. They have the equipment and expertise to get it right and prevent long-term issues like rust from setting in. To get a better sense of what the pros can do, have a look at our guide on the different types of car body repairs, which offers practical advice for every driver.
Gathering Your Tools for a Professional Finish
Any decent car scratch repair hinges on having the right gear on hand before you even touch the paintwork. Trust me, trying to make do with what you have got lying around in the garage is a recipe for making a small problem much, much worse. A bit of prep here saves a lot of headaches later.
Your best friends in this process are high-quality microfibre cloths. Do not even think about using old rags or tea towels; they will just grind new, finer scratches into the very surface you are trying to fix. You will need a few clean ones – one for washing, another for applying your compound, and a fresh one for the final buff.
The Repair Checklist
To get that smooth, almost invisible finish, your toolkit needs a few specific items beyond just the polish itself. Here is what I always make sure I have within reach.
Isopropyl Alcohol: A 70% solution is ideal. A quick wipe-down with this stuff cuts through any old wax, road grime, or silicone, giving your repair products a perfectly clean surface to bond to.
Masking Tape: Get proper automotive masking tape. Use it to carefully box off the scratch. This simple step protects the good paint around the repair from any accidental slips when you are polishing or sanding.
Applicator Pads: The right pad for the job makes a world of difference. A firm foam applicator gives you even pressure for compounds, whereas a softer microfibre pad is what you want for gently applying wax or sealant as the final step.
Fine-Grit Sandpaper: This is only for deeper scratches that need a bit of touch-up paint. You will need some extremely fine 2000 to 3000-grit wet and dry sandpaper to gently flatten the new paint so it sits flush with the original finish.
A quick word on safety: always protect yourself. A pair of nitrile gloves will keep harsh chemicals off your hands, and safety glasses are non-negotiable, especially if any sanding is involved.
The good news for DIYers is that the market for scratch repair products has exploded. We are seeing more advanced formulas hit the UK, giving you a much better chance of achieving a genuinely high-quality finish at home. If you are interested in the details, you can explore the latest industry insights on Coherent Market Insights.
For more hands-on advice, do not miss our guide with 2025 car bodywork repair tips for everyday drivers.
Preparing the Area for a Flawless Repair
If you take one thing away from this guide, let it be this: preparation is everything. This is where most DIY repairs go wrong. Rushing this stage is a surefire way to get a botched finish that looks even worse than the original scratch. A perfectly prepped surface is the only foundation for a repair that will actually blend in with your car's paintwork.
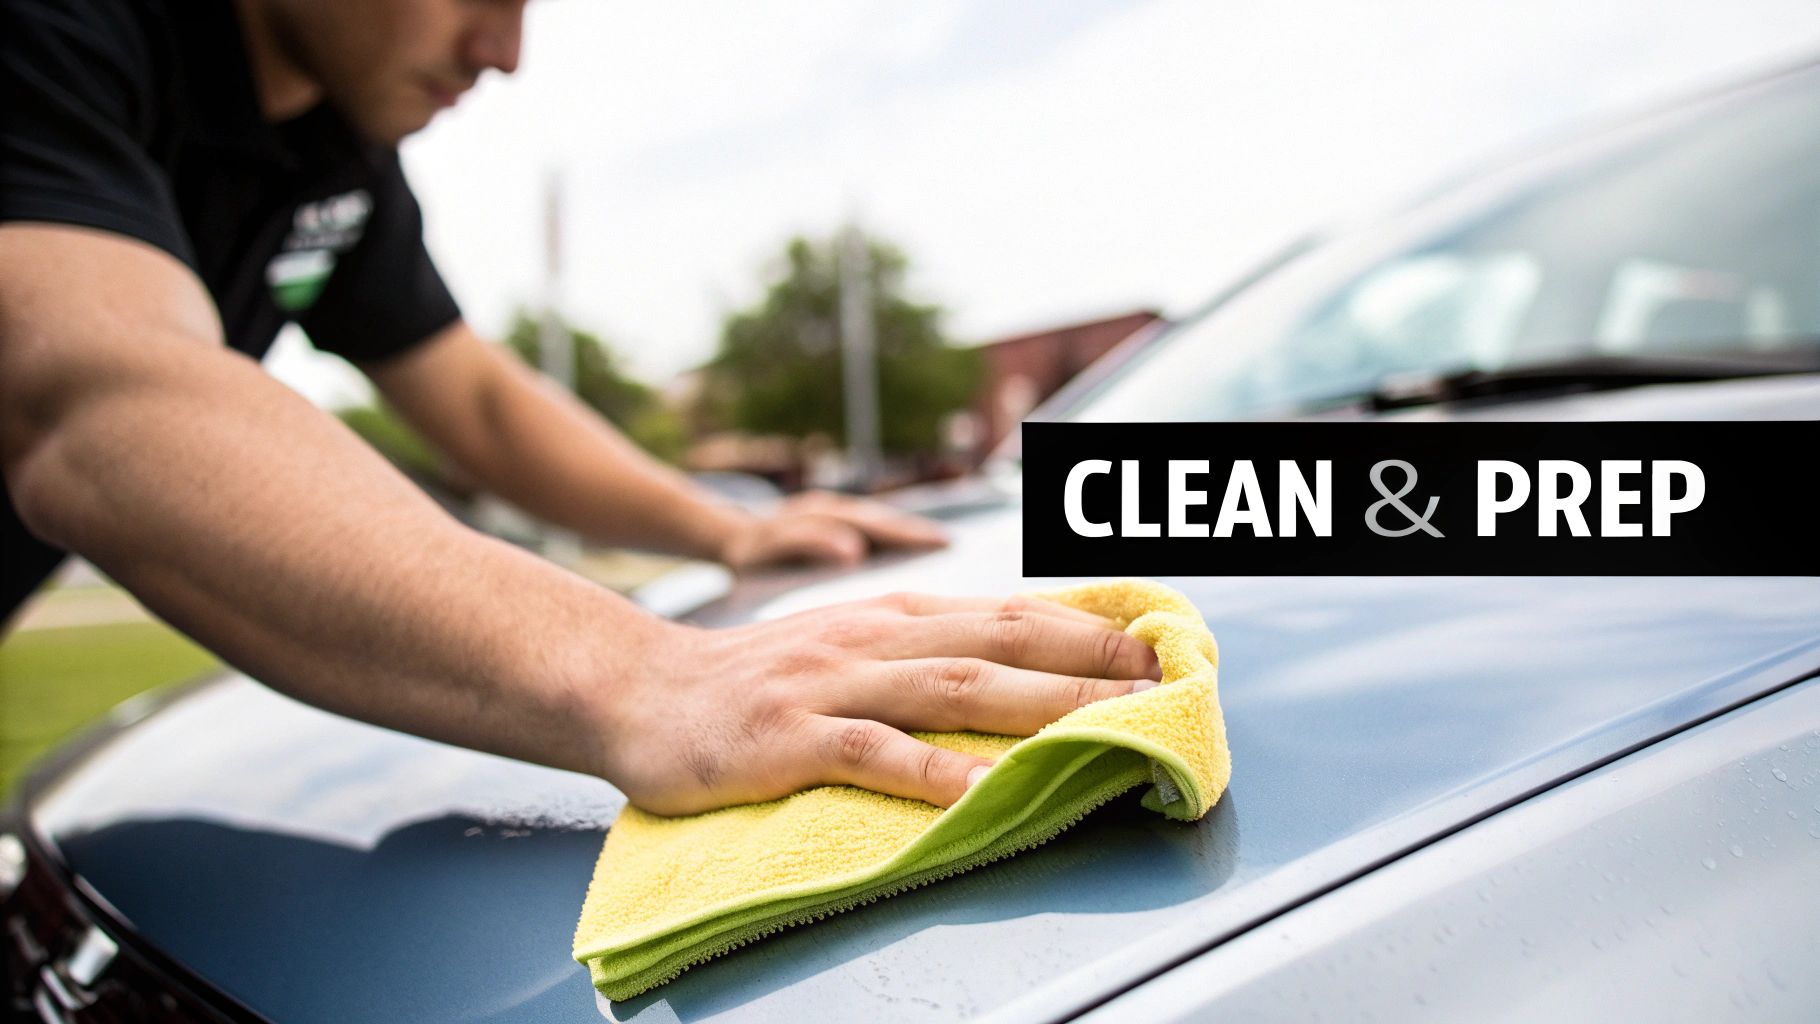
First, give the entire panel a proper wash. Do not just focus on the scratch itself; clean the whole door, bonnet, or wing. I always recommend using a good quality car shampoo and the two-bucket method to avoid grinding any loose grit into the paint and creating more fine scratches.
Once washed, you need to get the area bone dry with a clean microfibre towel. This is not just about preventing water spots; it lets you see the true extent of the damage you are about to tackle.
Creating a Contaminant-Free Surface
With the panel clean and dry, your next job is to strip away anything sitting on top of the paint. We are talking old wax, sealant, polish, or stubborn road grime. If you do not, your new touch-up paint or polish compound will not bond properly, and your hard work will not last.
The simplest way to do this is with a wipe-down using isopropyl alcohol (IPA) on a fresh microfibre cloth. It is a brilliant degreaser. If you want to be extra thorough, a dedicated panel wipe product from an automotive shop will also do the trick. The goal is to get the surface clinically clean.
A clean, grease-free surface is not just a recommendation; it is non-negotiable for a professional-looking repair. It gives your repair products the best possible chance to adhere properly and last.
The final prep step is to isolate the scratch. Get some high-quality automotive masking tape and carefully create a small "box" right around the damaged area. This is a crucial detail that protects the good paint from any accidental scuffs or stray polish, keeping your work neat and tidy.
Applying Scratch Removers and Touch-Up Paint
Alright, with the prep work done, it is time to get down to business. The way you tackle the repair really hinges on how deep the scratch is. We will cover the two most common scenarios you will face: a light scuff in the clear coat and a more stubborn mark that has gone down to the paint.
For those frustratingly light scratches that have not actually broken through the top layer, a good quality cutting compound is your best friend. Think of it as a very fine abrasive that gently polishes and levels the clear coat, making the scuff vanish.
Grab your applicator pad and pop a small, pea-sized amount of compound on it. Do not overdo it. Work in a small area at a time, using firm, even pressure. I find it is best to start with overlapping circular motions and then switch to straight-line passes that go across the scratch. This two-step motion helps work the compound in from all angles. After about a minute, wipe the area clean with a fresh microfibre cloth and see how it looks.
Tackling Deeper Scratches with a Touch-Up Pen
If the scratch has cut through to the colour coat or you can see the primer underneath, a compound simply will not cut it. This is a job for a touch-up paint pen, which you must match exactly to your car's specific colour code. The absolute key here is patience and building up the repair with multiple thin layers.
Your aim is to fill the scratch, not paint over it. Carefully dab the paint directly into the groove, doing your best to keep it off the surrounding, undamaged paintwork. Let each layer dry completely before you even think about adding the next. This slow-and-steady approach is what stops you from ending up with a raised blob of paint that is just as obvious as the scratch was.
My personal tip is to practise on a spare piece of metal or an old tin can first. This helps you get a feel for the paint flow from the pen and how thinly you can apply it before tackling your car.
Once the touch-up paint is fully cured (always check the instructions), you might notice it sits a little proud of the original paint. This is normal and easily fixed with wet sanding. Using a very fine 2500-grit sandpaper wrapped around a small sanding block, and plenty of water for lubrication, gently sand the high spot. The goal is to make the new paint perfectly flush with the surface around it.
This part might sound a bit daunting, but with a light touch and by checking your progress constantly, it is a perfectly achievable part of a good minor car scratch repair. Just be sure to follow up with a quality polish to bring back that deep, uniform shine.
Finishing and Protecting Your Repaired Paintwork
You have done the hard part and banished that annoying scratch. It is a great feeling, but do not put your tools away just yet. The final steps are all about making that repair invisible and protecting your handiwork so it lasts. This is what separates a decent patch-up from a truly professional-looking fix.
After using compounds or touch-up paint, you will probably notice the repaired spot looks a bit flat or hazy compared to the surrounding paint. That is perfectly normal. This is where a good finishing polish becomes your best friend. Unlike a cutting compound, a finishing polish has incredibly fine abrasives that do not remove paint but instead restore a deep, glossy shine.
With a clean microfibre applicator, gently work the polish over the repair and blend it outwards into the surrounding panel. This simple action is key to levelling out the sheen and making your minor car scratch repair blend in seamlessly.
Applying Wax for Long-Term Protection
Once you are satisfied with the gloss, it is time for the final protective layer. This is a step many people skip, and it is a real mistake. It is easy to confuse polish and wax, but they do very different jobs: polish creates the shine; wax protects the shine. A quality carnauba or modern synthetic wax creates a shield for your fresh repair.
This barrier is what will defend the new paint against UV damage, acid rain, bird droppings, and general road grime. But timing is everything. So, when can you apply it?
If you only used polish: Go ahead and apply the wax right away.
If you used touch-up paint: You absolutely must wait for the paint to cure fully. This could be a few days or even up to a month. Always, always check the paint manufacturer’s guidelines.
Applying wax too soon over fresh touch-up paint can trap solvents that are still trying to escape. This stops the paint from hardening correctly and can completely ruin all your hard work. A little patience here pays off massively.
Keeping this pristine finish is simple enough with regular washing and waxing. For a better handle on what professional repairs might set you back, take a look at our breakdown of the cost of car body repairs. To really keep your car's paintwork in top condition, investing in professional car detailing services is always a smart move.
Knowing When to Call a Professional
While tackling a minor scratch yourself can be incredibly satisfying, a bit of honest self-assessment is crucial. It is wise to know when to put the tools down and pick up the phone. Some jobs just are not suited for a driveway repair and need a professional touch to prevent bigger headaches later on.
The most obvious red flag? A scratch that has gone clean through the paint and exposed the bare metal underneath. That is your cue to stop.
Leaving metal exposed to the British weather is just asking for rust to set in. Once it starts, it can spread like a disease under the paint, leading to a much more complicated and expensive fix than the original scratch ever was. Another tricky area is textured plastic bumpers; getting that specific finish right with a DIY kit is nearly impossible. If you are not feeling confident or the scratch is just too big and daunting, calling a professional bodyshop is always the wisest choice.
The real danger of a poorly fixed deep scratch is not just that it looks bad. It is the rust that can silently creep in afterwards. Think of a professional repair as an investment in your car's future health and resale value.
So, what should you expect to pay? Professional work obviously costs more than a kit from Halfords. For deeper scratches that need sanding, filling, and a proper respray, UK drivers often find themselves with quotes anywhere from £350 to £500. Of course, this can vary wildly based on your car and location, and some great independent specialists might charge less. You can see what other UK drivers have been quoted on PistonHeads for similar jobs.
If the damage is a bit more serious than a simple scratch, our minor accident repairs guide offers more comprehensive advice.
Got Questions About Scratch Repair? We Have Got Answers
Even after walking through the steps, it is natural to have a few lingering questions about your specific scratch. It happens to everyone. Let's tackle some of the most common queries we hear from DIYers to help you get a flawless finish.
Does the Toothpaste Trick Actually Work?
You have probably seen the life hacks online claiming toothpaste can buff out scratches. In short, please do not try it.
While toothpaste is technically an abrasive, it is far too harsh and inconsistent for your car's clear coat. Using it will likely just replace the original scratch with a web of finer, swirl-like scratches, leaving a dull, hazy patch. It almost always makes the problem worse. Stick to products that were actually designed for automotive paint.
When Is It Safe to Wash the Car After a Repair?
Patience is key here, and the answer really depends on what kind of repair you have done.
If you only used polish and wax: You are pretty safe to wash the car after about 24 hours. This gives the wax enough time to properly set and bond to the surface.
If you used touch-up paint: You absolutely must wait for the paint to fully cure. Rushing this can pull the fresh paint right out of the scratch. This process can take anywhere from a few days to a full week, so always check the specific instructions on your touch-up paint bottle.
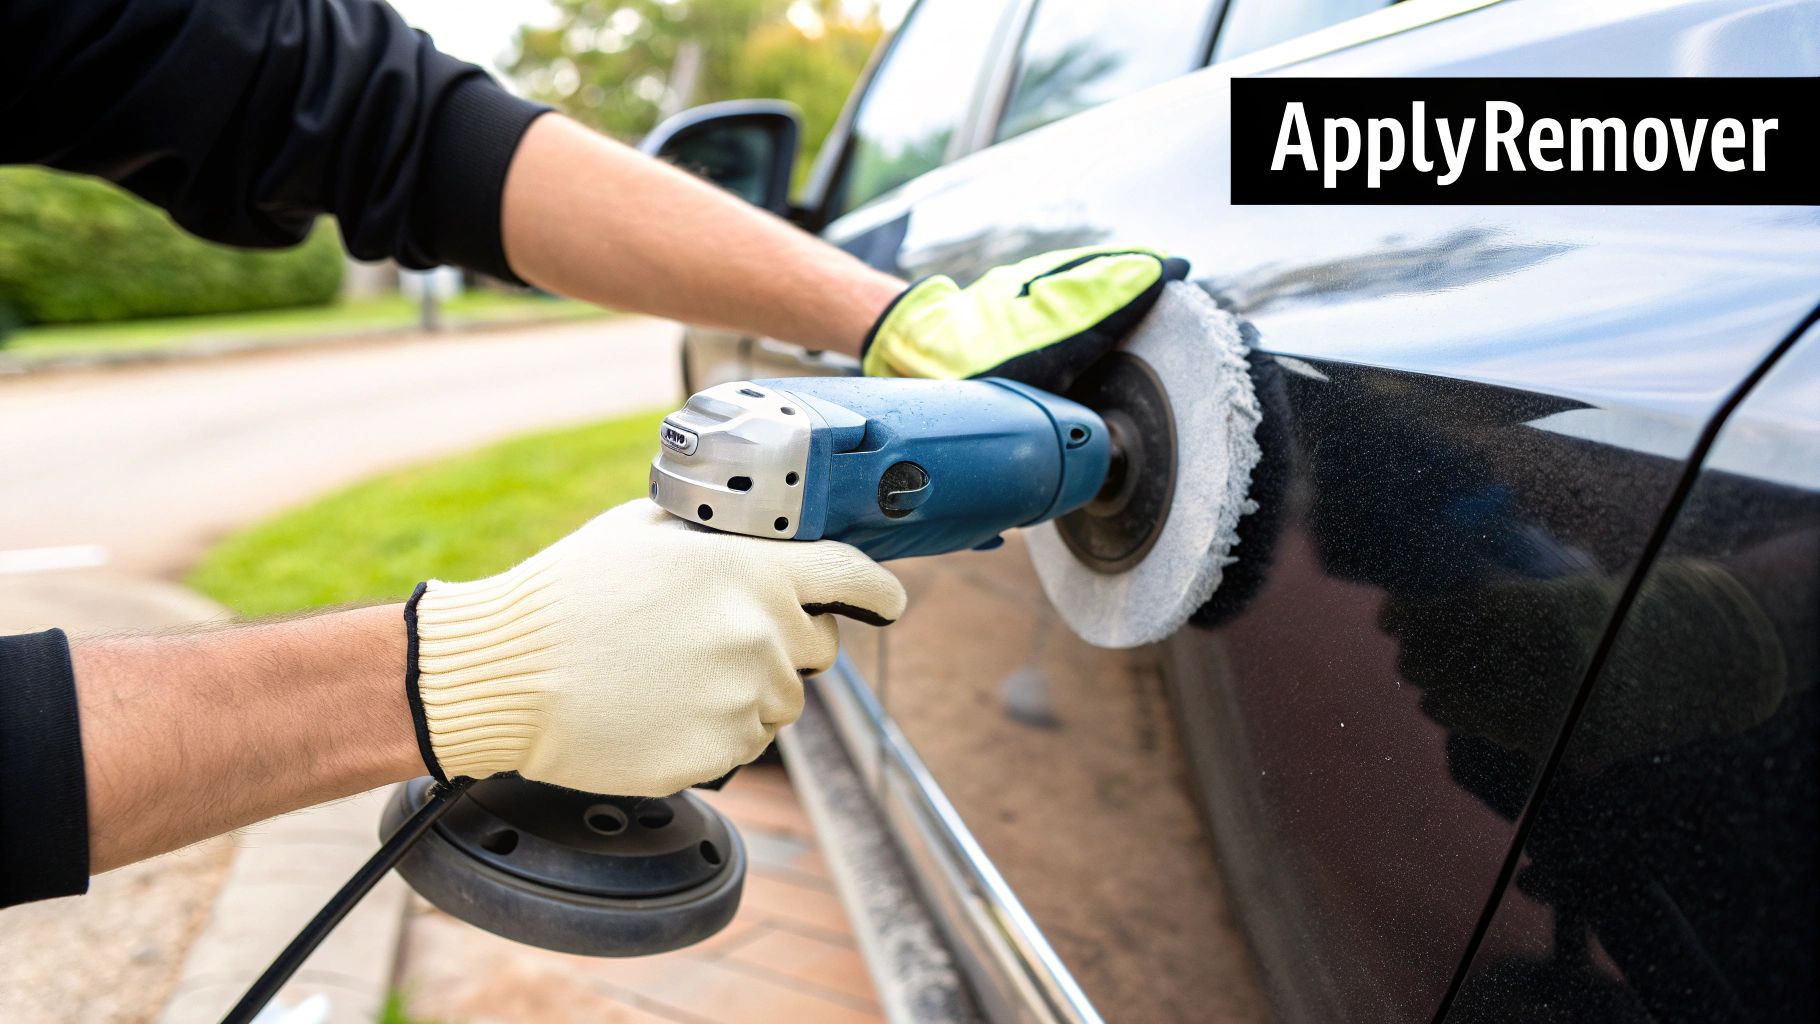
Should I Invest in a Machine Polisher?
If you are tackling a larger scuffed area or you are a perfectionist chasing that truly professional, glass-like shine, then yes, a dual-action (DA) polisher is a brilliant investment. It works much more evenly and efficiently than your arm ever could.
Do not be intimidated! DA polishers are remarkably safe for beginners. The trick is to start on the lowest speed setting with a light polishing pad until you get a feel for how it handles. This helps you avoid any risk of damaging the paint.
If you have assessed the damage and feel it is a bit beyond a DIY fix, do not worry. The expert team at Krause Autos is here to help. Whether it is a minor cosmetic touch-up or more significant bodywork, we offer professional, honest service for drivers across Bedfordshire. You can book your repair with us at https://www.krauseautos.co.uk.


Comments